Hi there blog buddies,
A happy New Year and I hope 2014 is going to be a great modelling year for you.
This week I am going to start with the track bed risers.
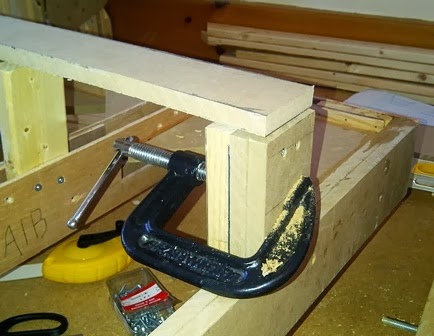
I worked out the lowest and highest points of the track bed which would be at the front and rear of the layout. From there I worked out a middle height that would hold the track bed for the incoming trains in the centre of the layout. I started at the far right of the layout on one of the two foot sections and fitted the risers with the track bed on top. The risers are cut from 2” x 3/4” lumber and fixed in place in between the 1/4” plywood strips and secured with glue and screws. The track bed is cut from 1/2” MDF which is glued and screwed to the top of the risers. I took great care to ensure that the track bed is as level as possible as my rolling stock has pin point bearings and I don't want anything rolling away.
 When it came to the baseboard joints, I took my time to get them right at this point and the track bed is supported on top of three risers of 1/2” MDF and glued and screwed. I am not the best joiner in the world but I found if I took my time I could get it right first time, most of the time!
Once I had fitted all the risers for the centre track bed I could start laying the track down temporally to ensure that all the points (switches, as I now live in Canada) were free of the supports below and that I could fit the point motors without much trouble.

I marked all the points so I would remember which one went where as due to space restrictions some are shorter than others.From here I fitted the risers and track bed climbing up to the rear of the layout and dropping down to the dock side at the front of the layout.
I decided I would glue the track bed straight down on to the 1/2” MDF as the railway would be ballasted by ash and partly buried at some points as the track would have been poorly maintained by the period of the model which is nearing the end of the dockyard railway life around the middle to late sixties.
I started laying the main line points at the West side of the layout as it is the most complicated piece of track work on the layout and I wanted to get it right first time.
 This was followed by the dock side line which drops down to what is going to be the Royal Naval research establishment with a kick back siding dropping away West to the docks.
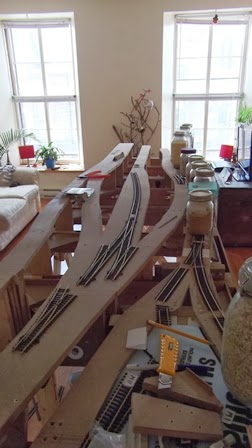
 The track work climbing up to the rear of the layout and to the sidings of the Royal Naval research establishment were laid next with a kickback siding climbing away to the west to the Royal Navy stores division and again, every kitchen jar was pressed into service.
My biggest worry was that I had made the gradients too steep, but the shunting locos would never be pulling more than two or three wagons so I should get away with it. Once the front and rear lines were laid I completed the track work with the laying to the main line coming into the dockyard and run round loop. I started playing around with mock up buildings to try and set the atmosphere for the layout that I was trying so hard to create.
For me, the most important factor of a layout is that it runs as well as possible. As I intend to take this very British of layouts to railway shows round southern Ontario then I look upon it a piece of high theatre that has to entertain the public who have handed over their hard earned dollars for great show.
Anyway, enough of me ranting on, no matter what standard you work to, the main thing is to enjoy what you do.

Thanks for joining me in my rambles.
The thought for the day is:
Don't rule out working with your hands. It does not preclude using your head.
Thanks, until next time,
Calum
www.3dk.ca


No comments:
Post a Comment